What are my account settings?
Open Account
To open the settings page for any account or sub-account, in Global Navigation, click the Courses drop-down menu [1]. Under the Managed Accounts heading [2], click the name of your account.
Open Settings
In Account Navigation, click the Settings link.
Settings
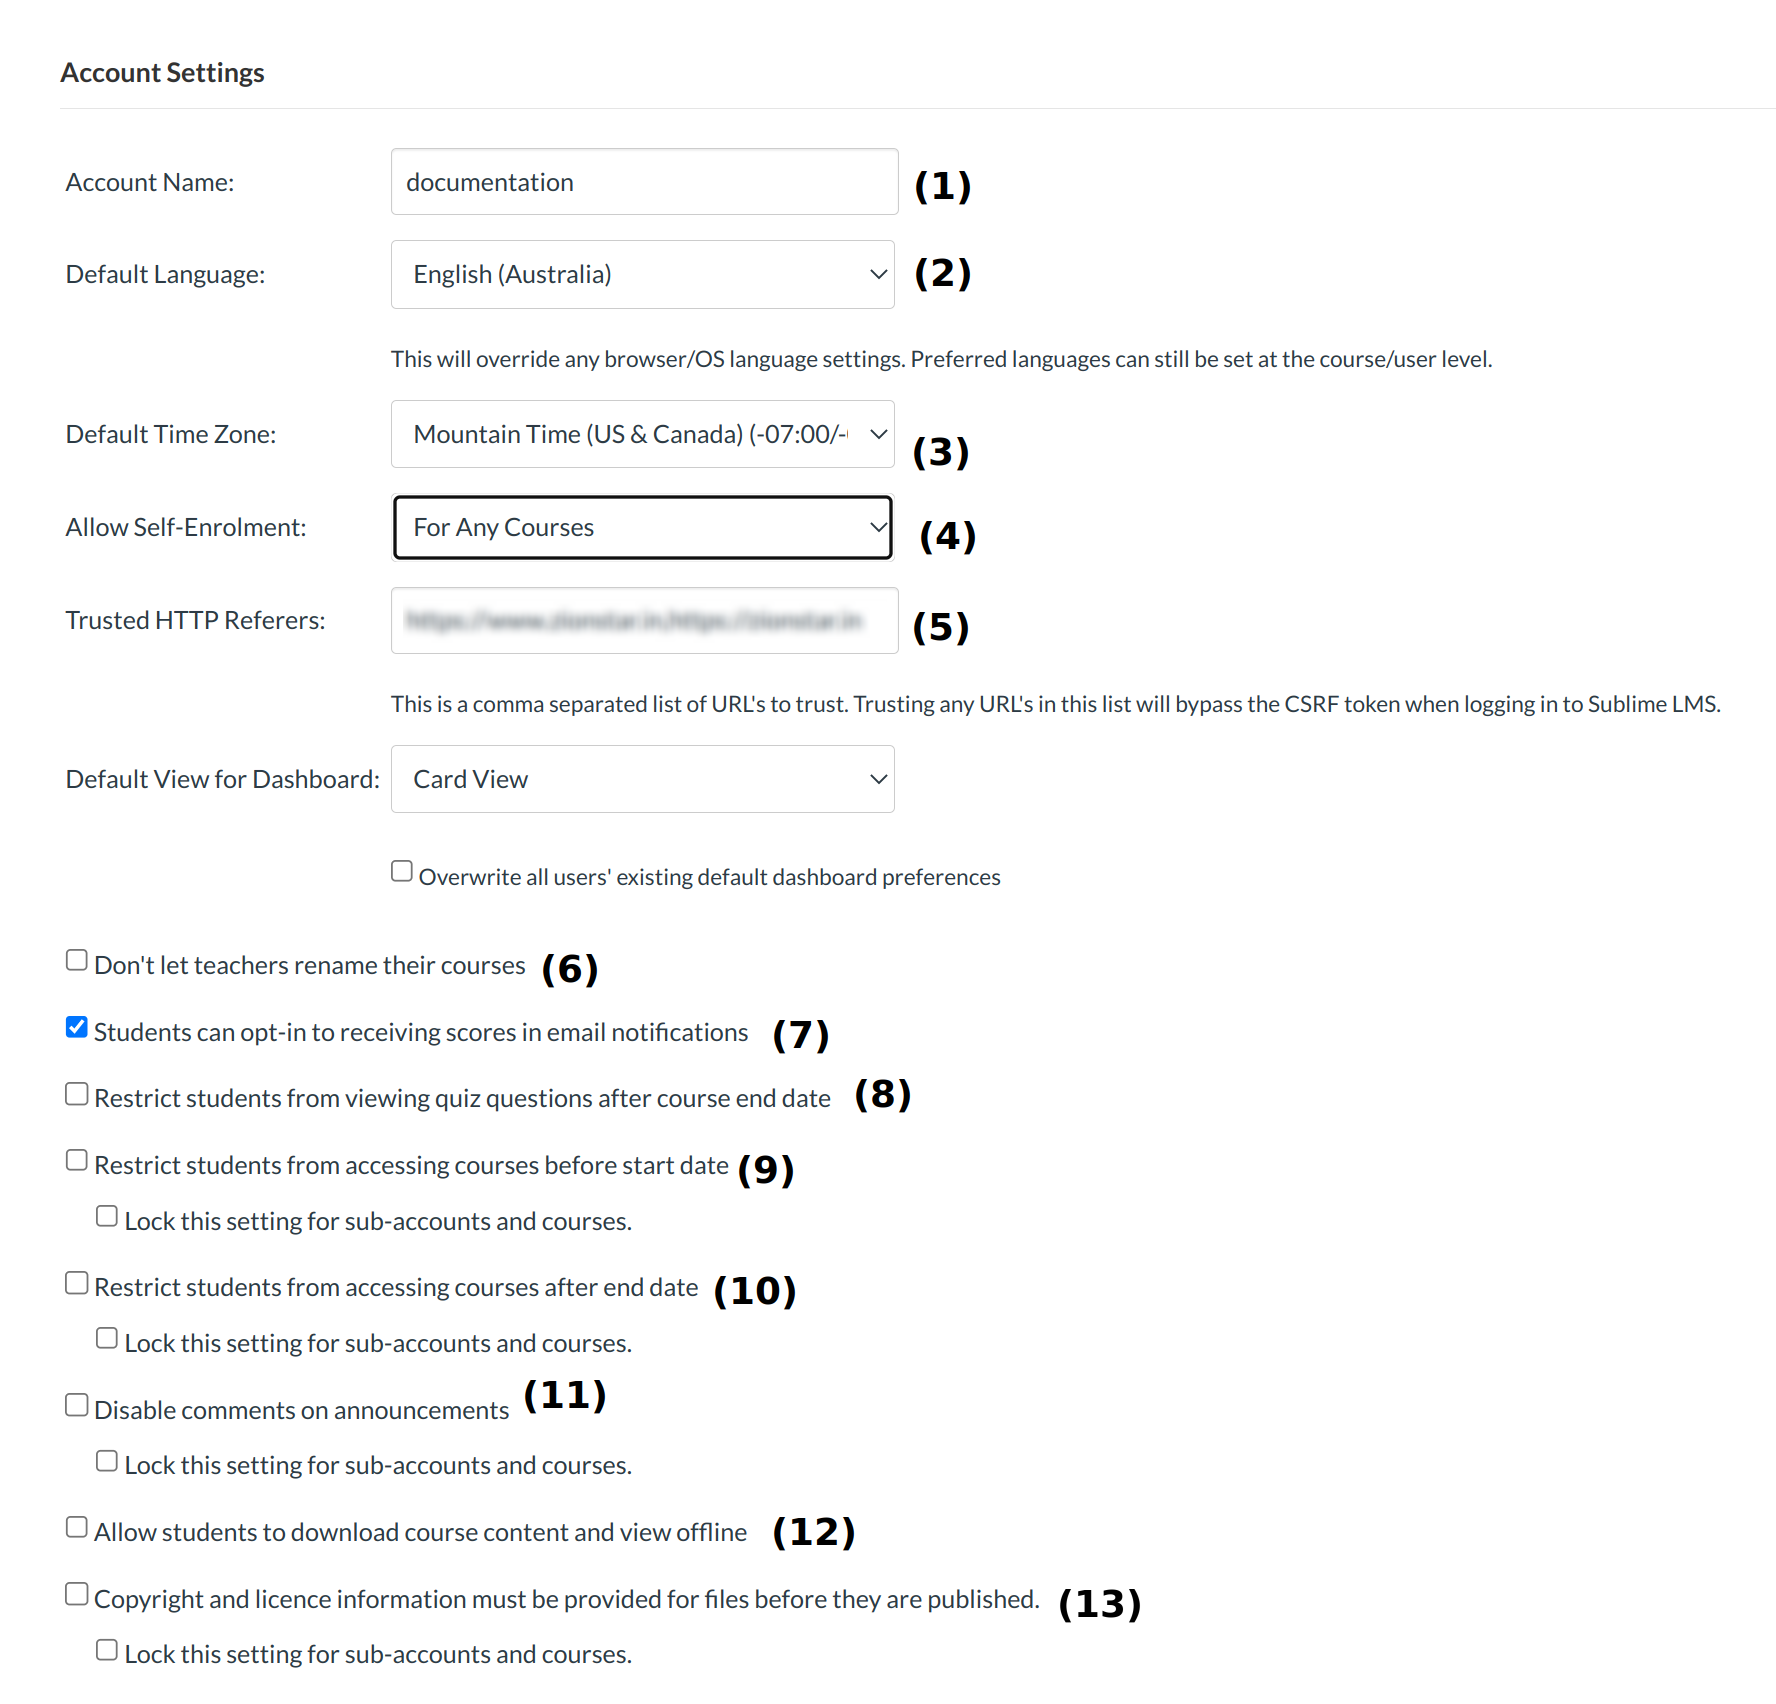
In the Settings tab, you can specify settings for the entire account, including account name [1], default language [2], default time zone [3], and self-enrollment option [4]. If your account is not already using an external identity provider (IdP) for authentication, you can customize the login label for your account's login page [5].
You can also allow or restrict four options for the entire account:
- Don't let teachers rename their courses [6]
- Students opt-in to receive their scores via email Notification [7]
- Restrict students from viewing courses before the start date (select this option to not let students see any future enrollments until the student start date set in the upcoming term dates) [8]
- Restrict students from viewing quiz questions and answers after the course ends [9]
- Restrict students from accessing courses after end date [10]
- Disable comments on announcements [11]
- Allow students to download course content and view offline [12]
- Copyright and licence information must be provided for files before they are published [13]
Note: The sub-account settings look different than the account settings.
View Quiz IP Address Filters
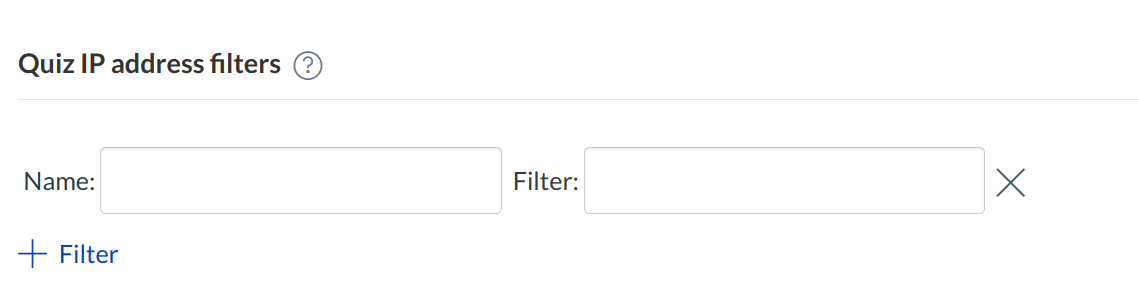
The Quiz IP Address filter allows an admin to setup a set of IP filters that can be used to limit quiz-taking to those filters. This is often used by an organization to limit tests to an on-campus testing center.
Note: Sub-account admin can set Quiz IP Address Filters.
View Features

The Features section of this page is where you enable or disable certain built-in functionality of Sublime LMS ™. This is also where, in the case of equalla and Turnitin, you enable those third-party integrations.
Note: Sub-account admin can only set Equella, Turnitin, Analytics, and User Avatars.
View Similarity Detection Platform
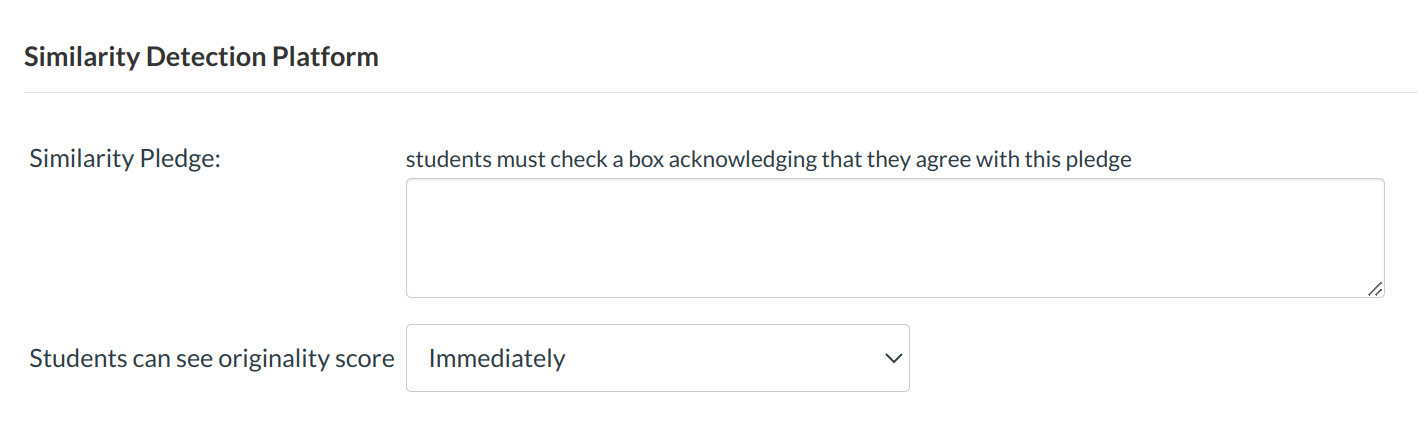
Scroll down the similarity detection section,here you can adjust the message students will see and need to agree to.
View Web Services
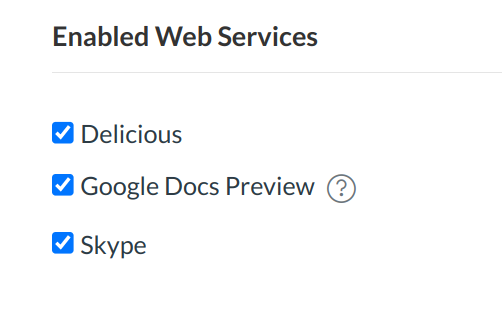
The Enabled Web Services section is where you enable third-party integrations. These integrations can be used to extend the functionality of a user's Sublime LMS ™ profile. For example, when a user connects their Facebook profile to their Sublime LMS ™ user profile, Sublime LMS ™ can send that user private Facebook messages about new assignments, quizzes, messages, etc. This is all configurable in the user's Notification Preferences.
Note: Sub-account admins cannot enable web services by default.
View Who Can Create New Courses
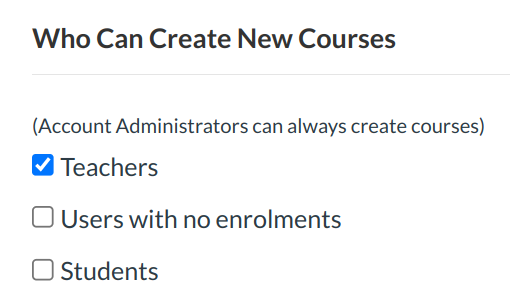
You can choose who can create new courses within your account. Remember to click the Update Settings button when you make changes.
Note: Sub-account admins cannot choose who can create new courses by default.
Quotas
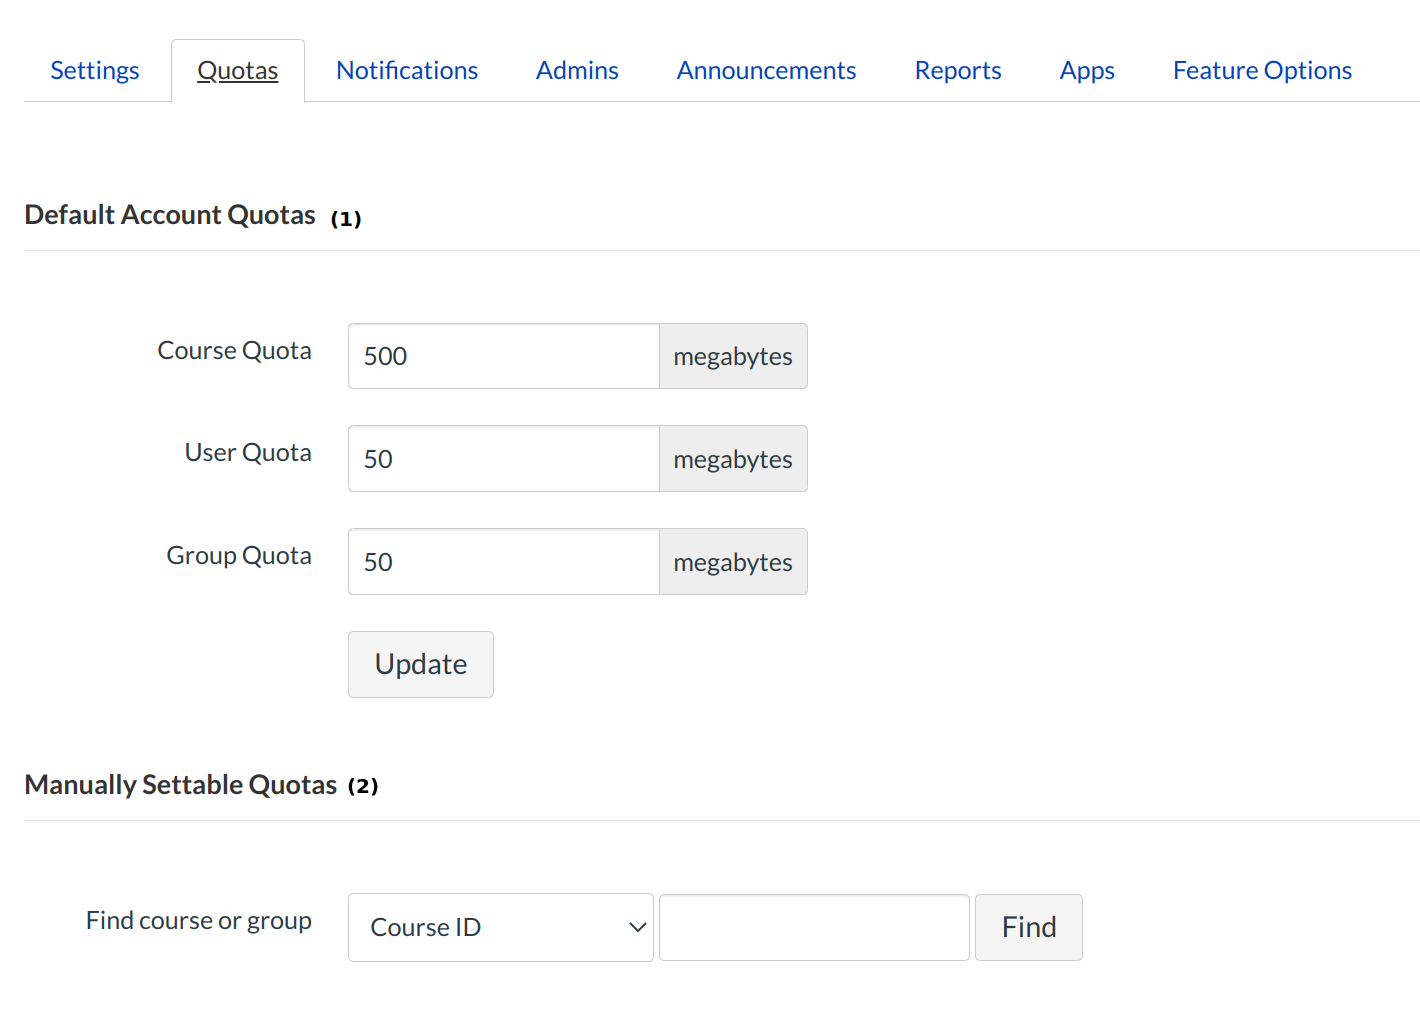
In the Quotas tab, you can set default account quotas for courses, users, and groups. You can also set quotas by Course ID or Group ID.
In the Default Account Quota [1] section, type a new number in the quota fields to change the quotas. This will change the quotas for courses, users, and/or groups for the entire account. Click the Update button when you are finished to save your changes.
In the Manually Settable Quotas [2] section, search for a course or group by entering the ID number and clicking the Find button to change the quota for that specific course or group. Once you type a new number in the quota field, click the Update Quota button to save your changes.
Note: The course ID is located at the end of your course URL .
Notifications
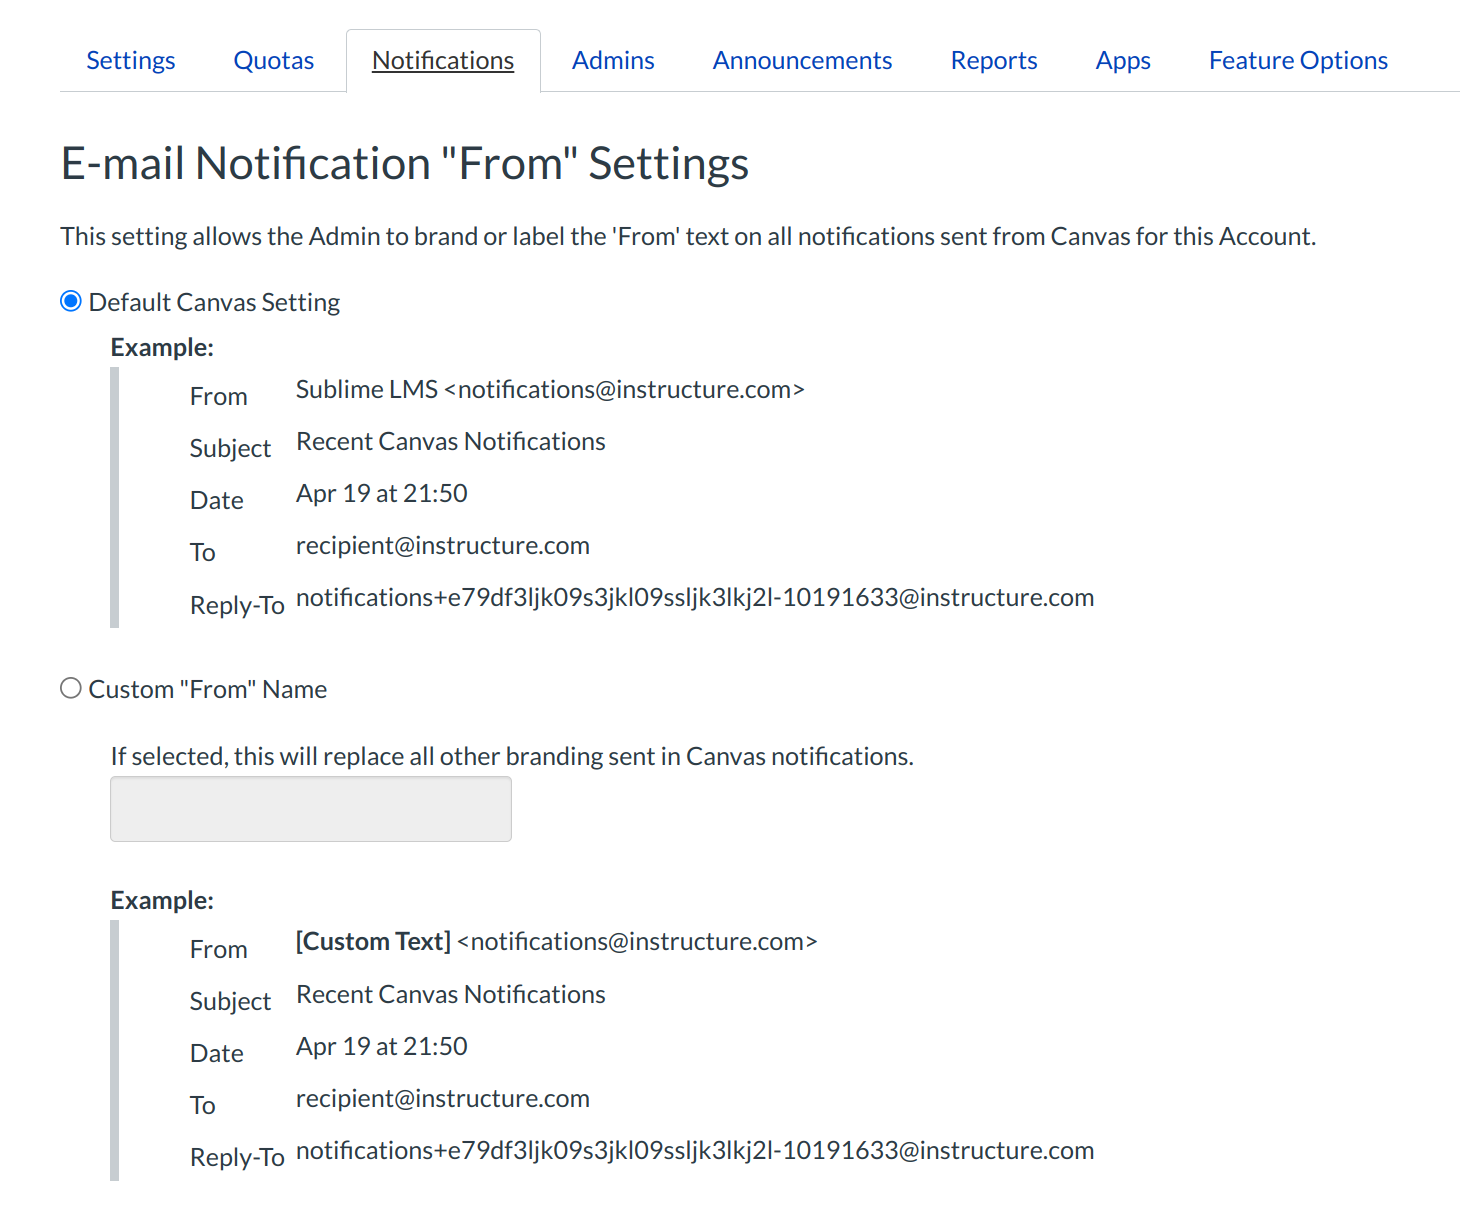
In the Notifications tab, you can set up a custom "From" text field for Sublime LMS ™ notifications. This custom text can be your institution name or whatever sender information you would like to use. Using the custom text field helps student identify notification emails more easily and improves the quality of student-instructor interaction.
Notifications Sent to External Services
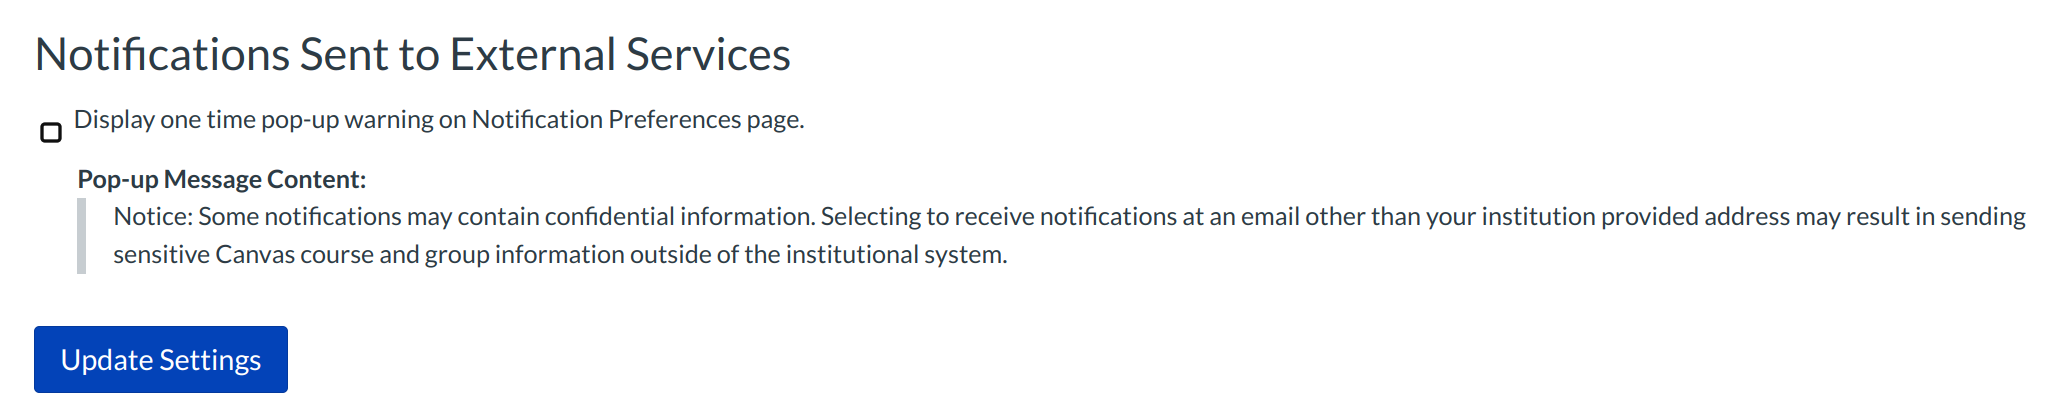
By selecting the pop-up message checkbox, a pop-up warning will alert users that adding a non-institution based email address may result in the exposure of sensitive content.
Admins

In the Admins tab, you can view and edit the admins assigned to this account. If you are working with sub-accounts, admin privileges are limited to the scope of just that sub-account and below.
Announcements
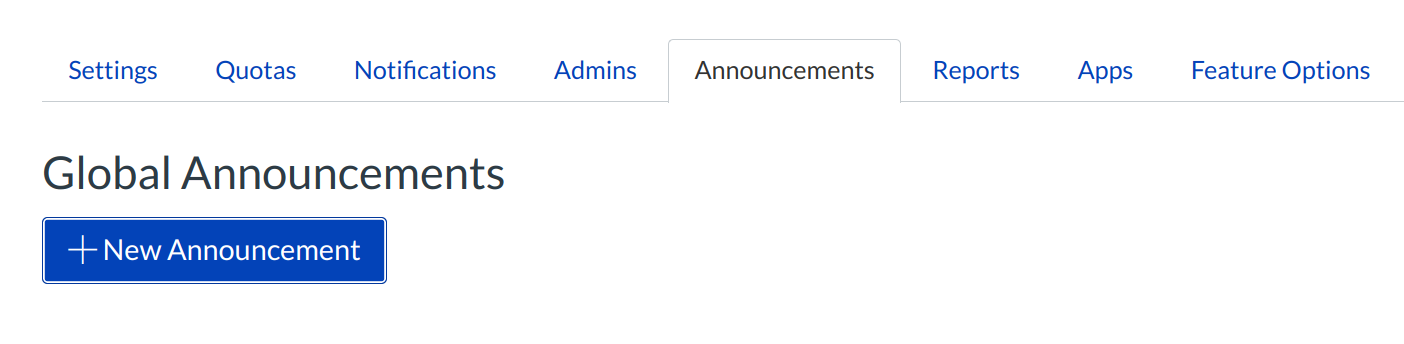
In the Announcements tab, you can send out global announcements to every user in that account. These announcements are used to announce events such as building closures, class cancellations, holidays, etc. Learn more about global announcements.
Note: Only top-level account admins can send global announcements. Global announcements are not available in sub-accounts.
Reports

The Reports tab is where custom reports will appear after you design them. There are many more reports available in Sublime LMS ™, they just aren't listed on this page. They are available in context. Quiz reports, for example, are available from the quiz page itself. User reports are available on the user's profile page.
External Apps

In the Apps tab, you can view all available external learning tools in Sublime LMS ™. External learning tools are often developed as LTI integrations. These tools may be published along with a textbook, and access to these tools is often restricted to students in the course. Any LTI provider should be able to give you the information you need to configure the tool in Sublime LMS ™. Once configured here at the account level, it is available to any course designer or instructor in the account.
Feature Options
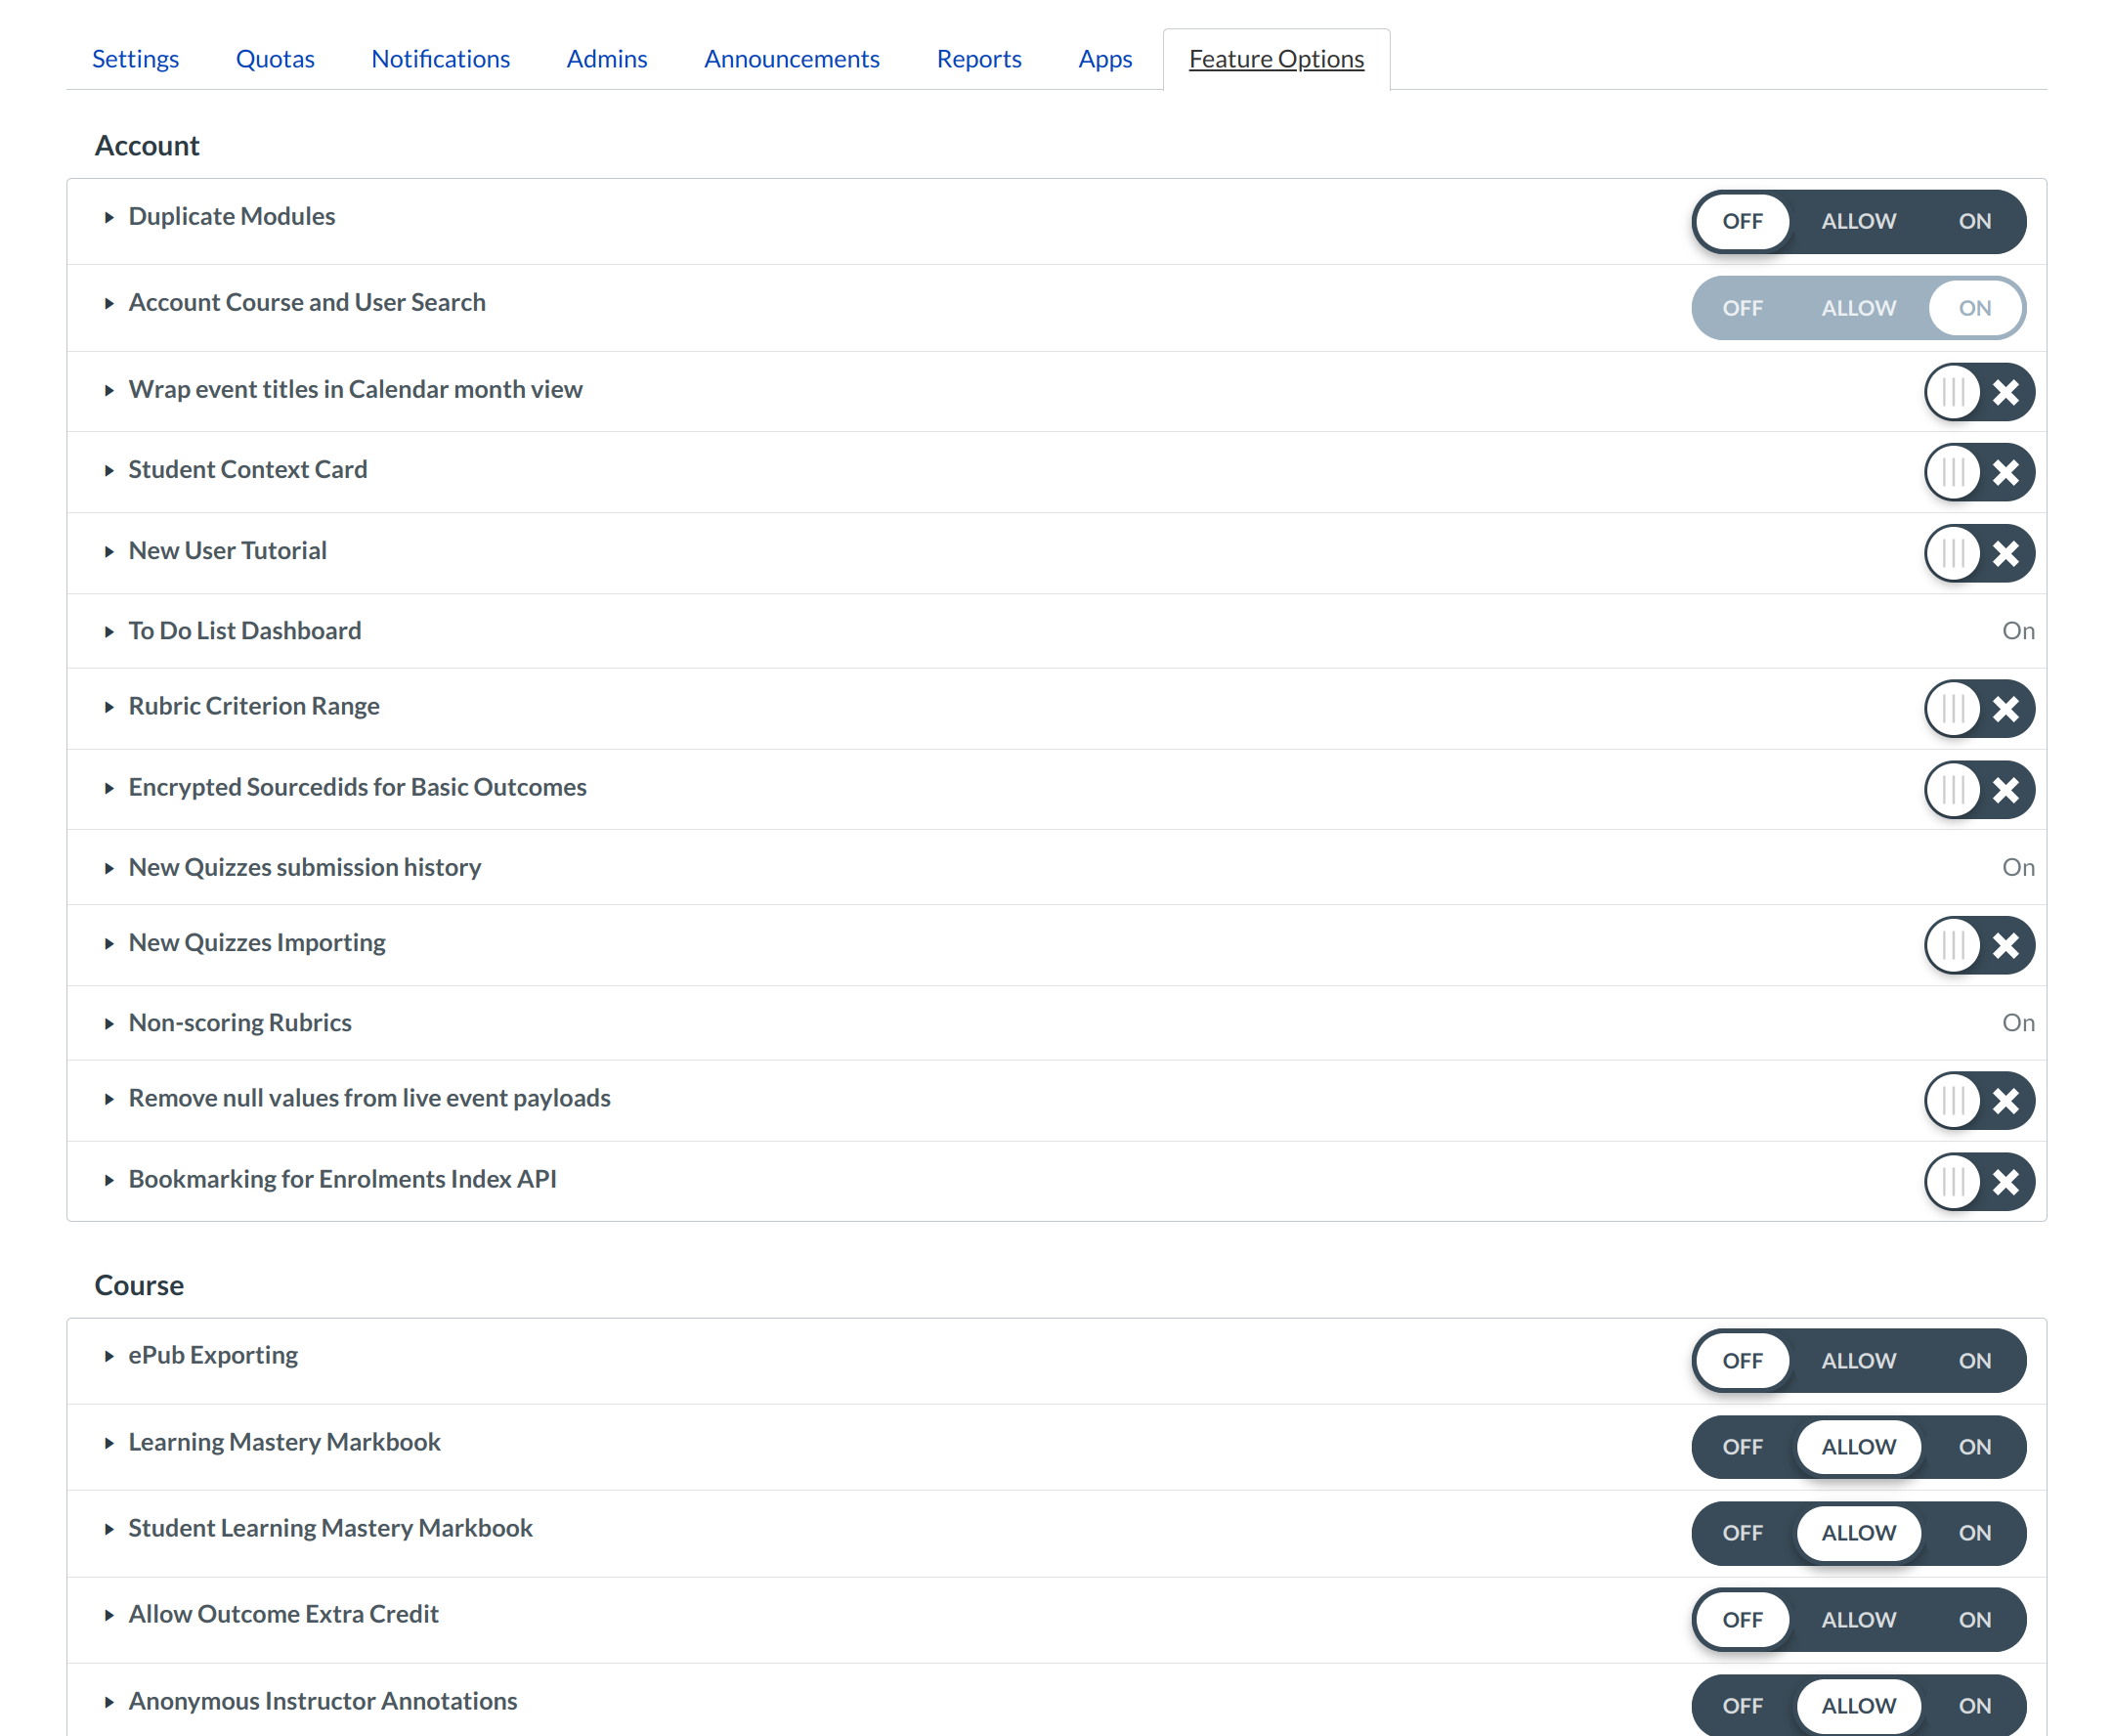
The Feature Options tab displays new features that are available to your account on both the account and course levels. Features can be turned on for the entire account, turned off for the entire account, or allowed so instructors can decide whether or not to use the feature. Instructors can enable course-allowed features on a course-by-course basis.