How do I lock files and folders?
By default course files are visible and accessible to all users. Teachers and TAs can lock files and folders, which means the content will only be accessible to teachers and TAs in the course.
Open Files
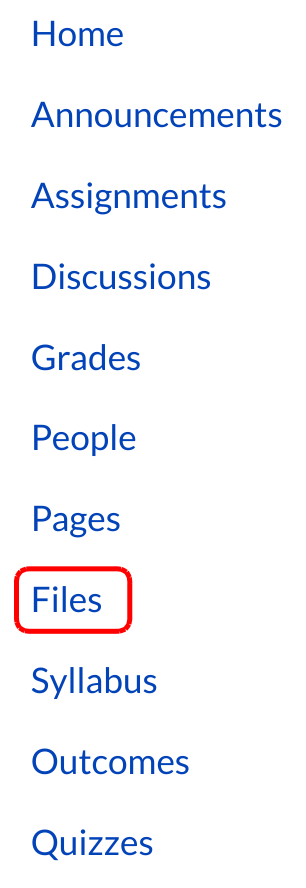
Click the Files link.
Select File
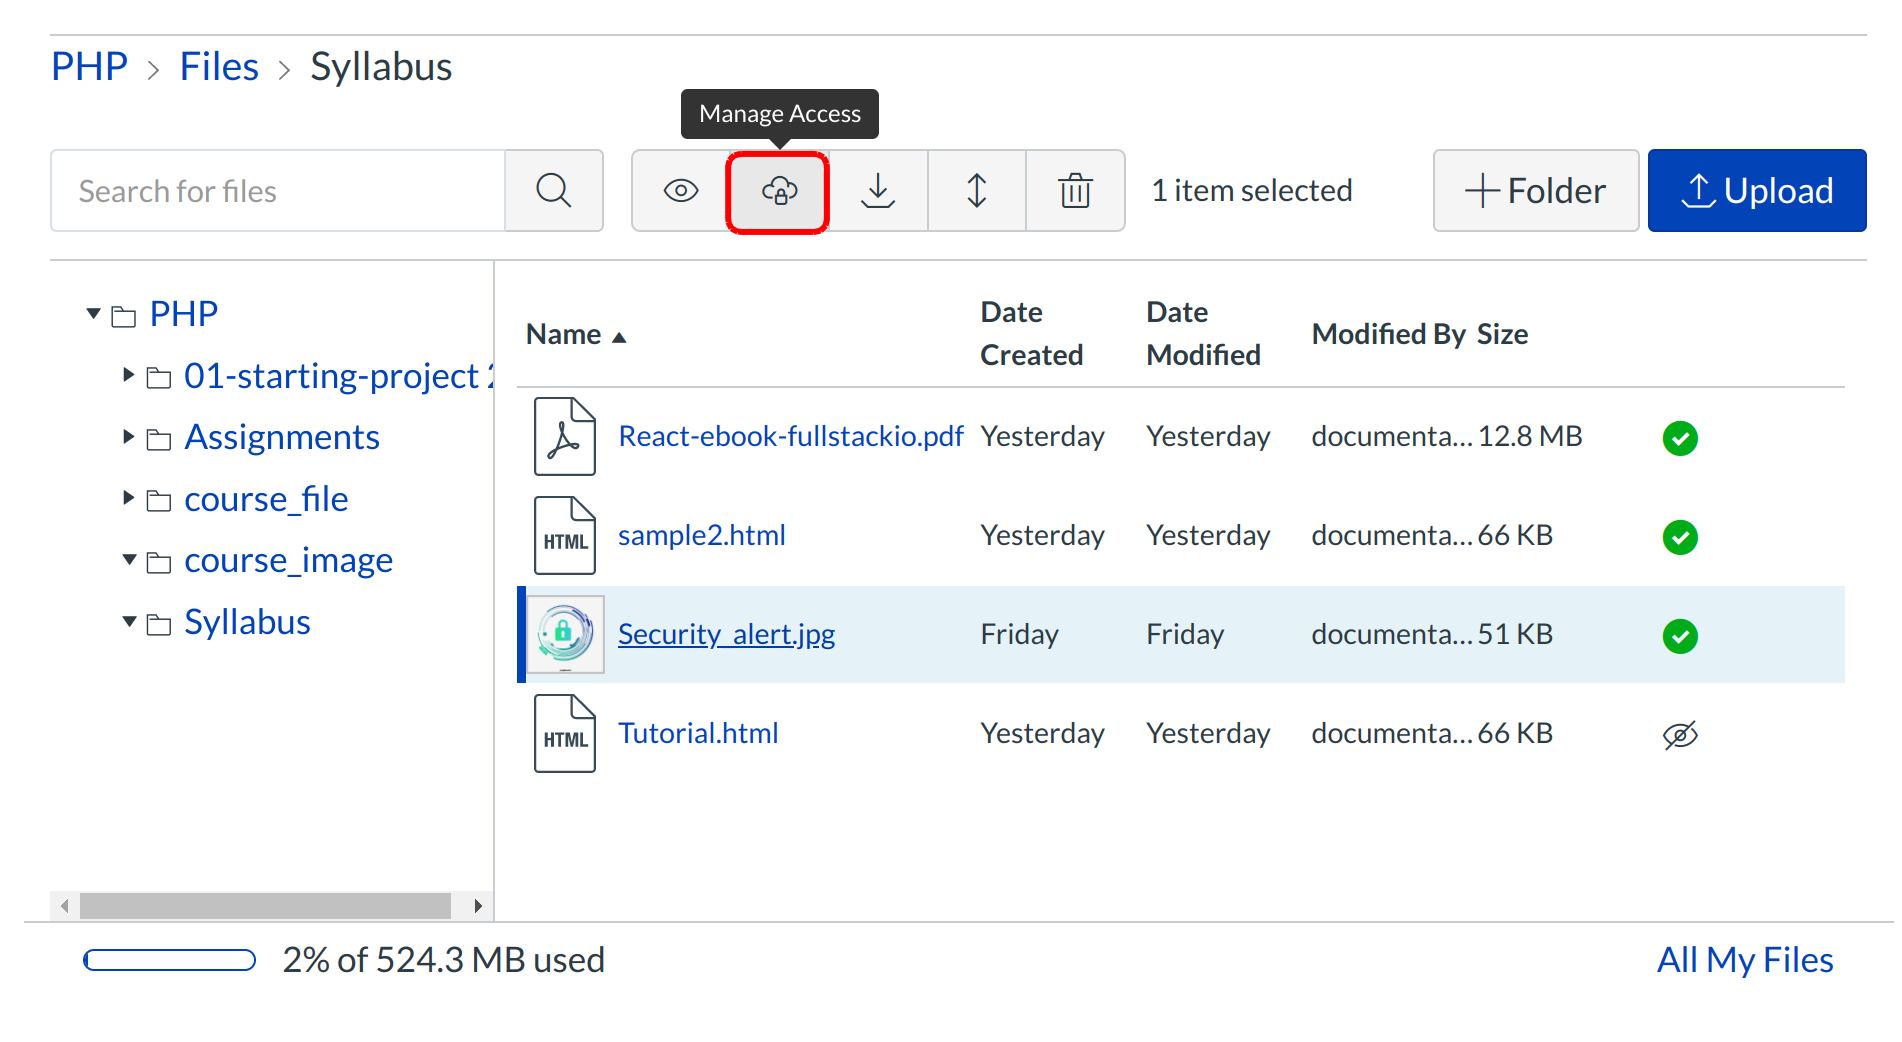
By default course files are visible and accessible to all users. Teachers and TAs can lock files and folders, which means the content will only be accessible to teachers and TAs in the course. Select the file or folder and click the Manage Access icon to lock the file or folder.
Select Lock Settings
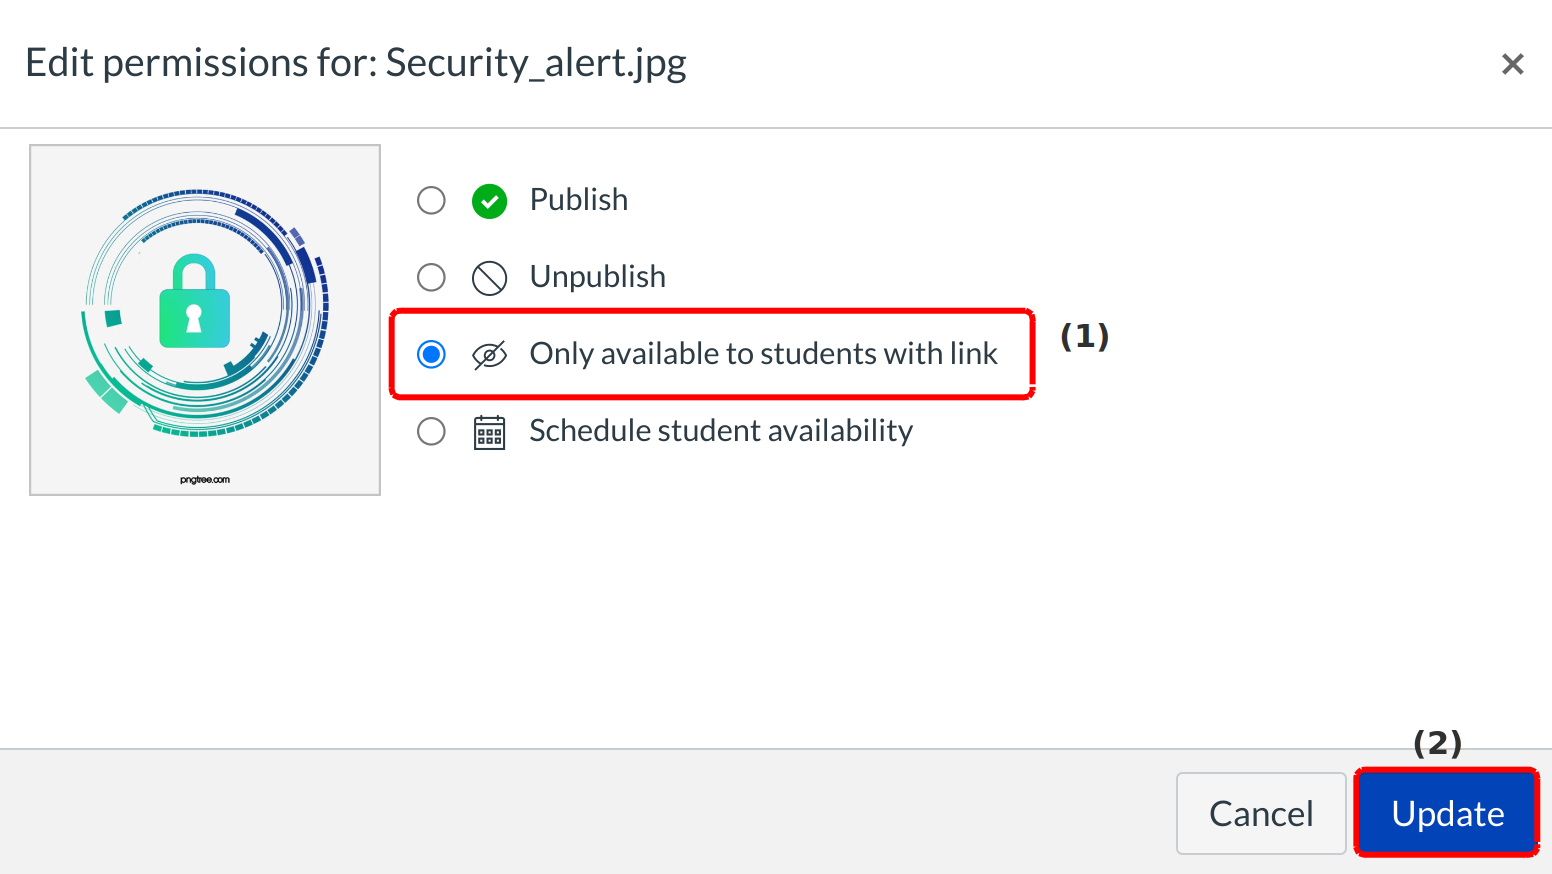
Click the Only available to students with link option [1] to let students view the file only if you link to it, but will not allow students to access the file via the Files tool.
Click the Update button [2] to make the changes and lock the file.
Set Lock Date
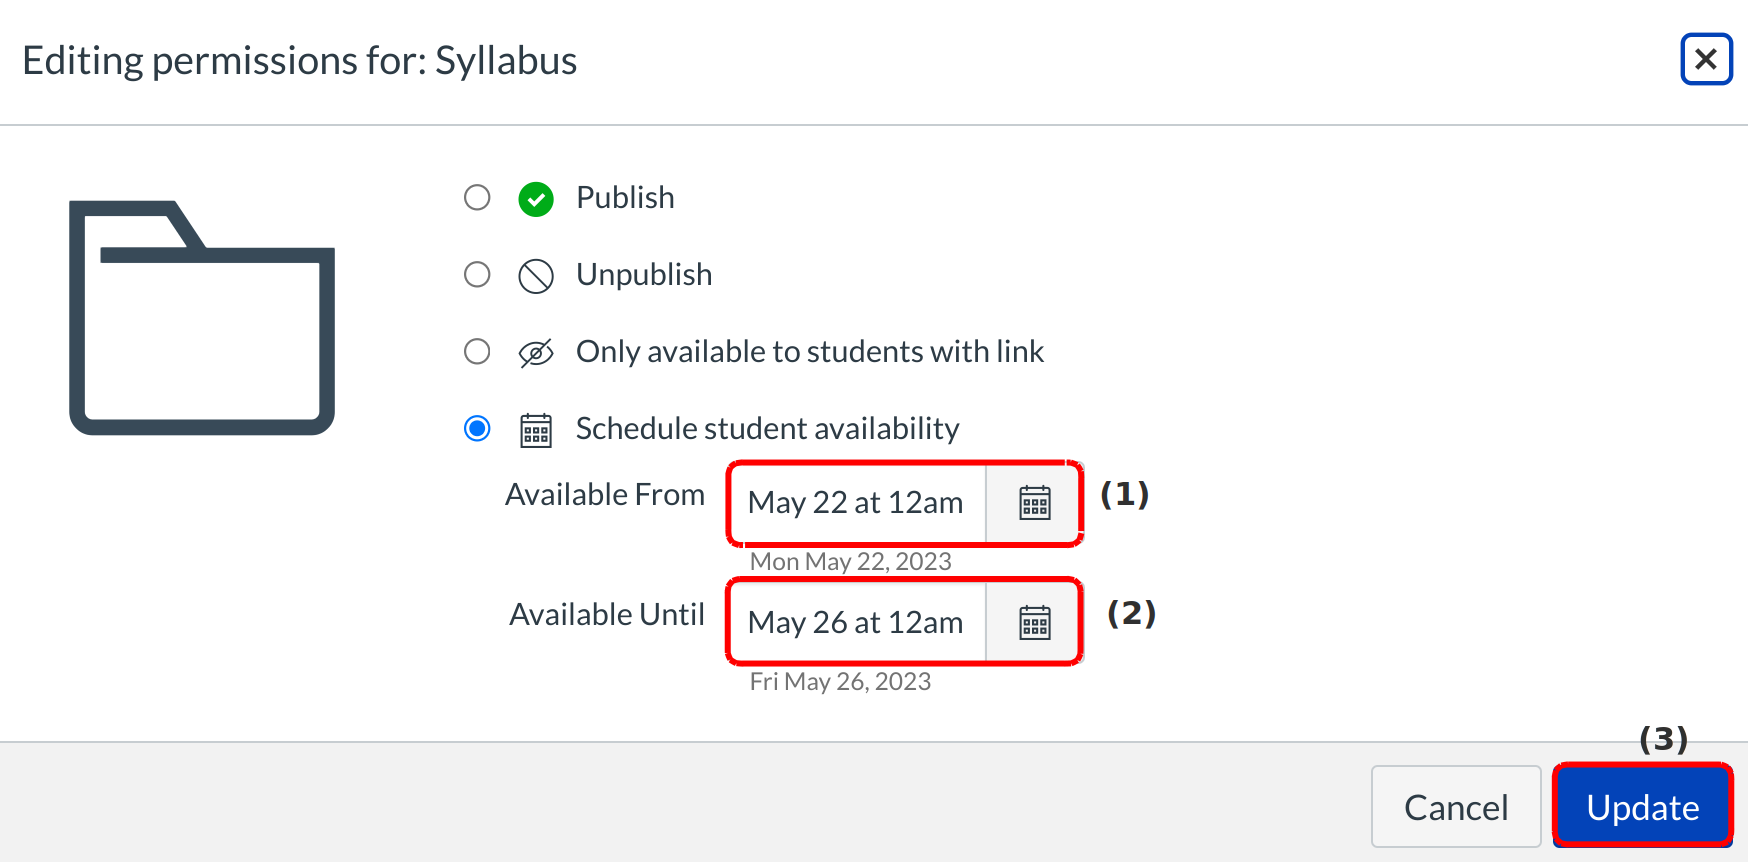
Type the date you wish to lock the date start from in the Available From field [1]. Type the date you wish to end the date in the Available Until field [2].
dd/mm/yyyy 00:00 (24hr) Ex. 22/05/2023 23:59
dd/mm/yyyy 00:00am/pm Ex. 26/05/2023 11:59pm
Monday 00:00am/pm Ex. May 22 11:59pm
Friday 00:00 (24hr) Ex. May 26 23:59
Note that the time field is optional and if not selected it will default to 12am.
Click the Update button [3].
Note: You can set a lock date on a file or folder.
View File
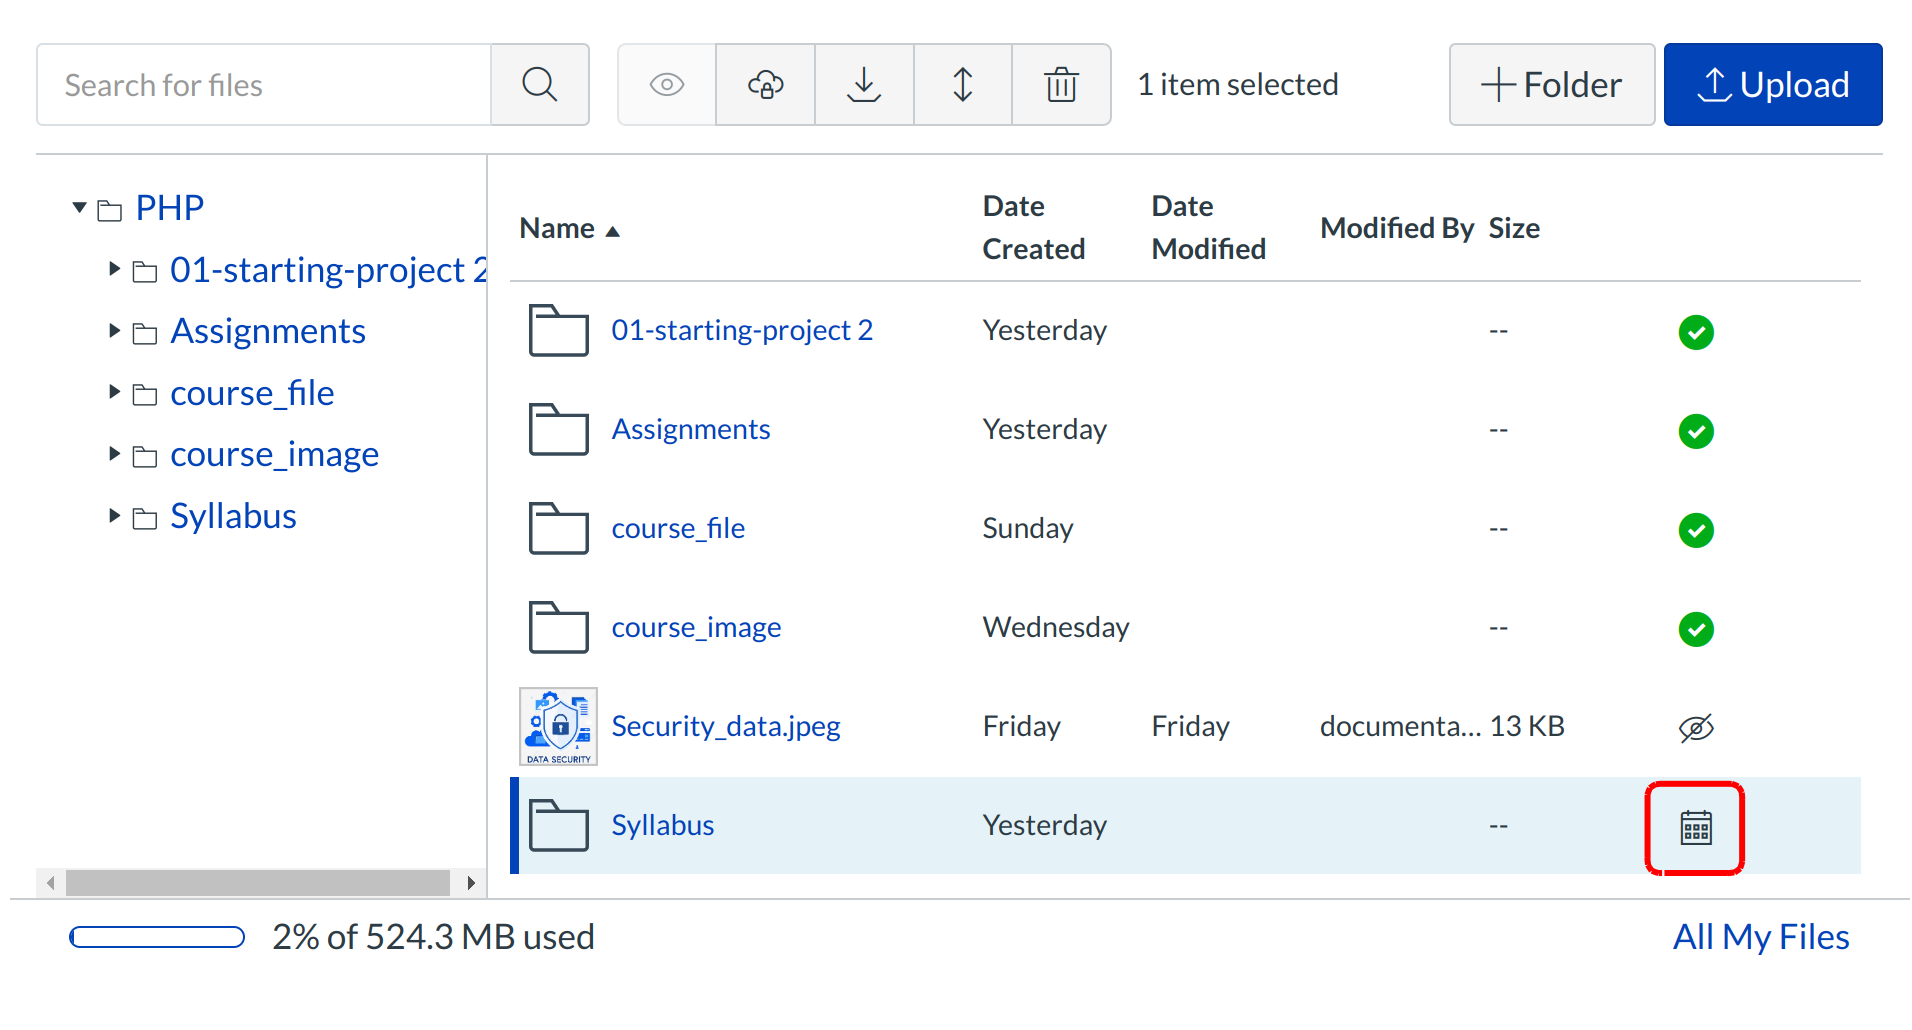
View your locked file, indicated by the Calendar icon because of it is locked by date.
Preview File

To preview your file, click the file or folder link [1] or click the Download link [2].
Unlock File
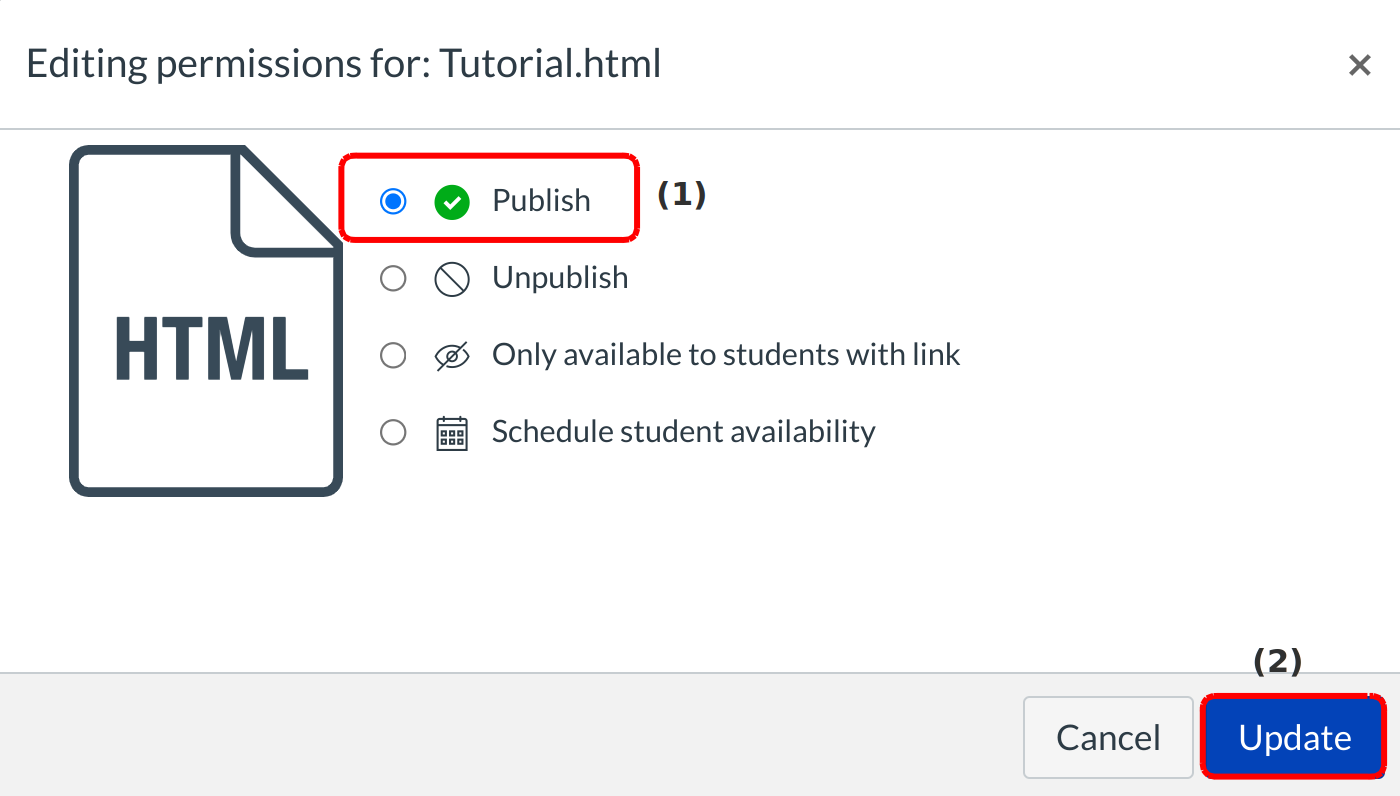
For unlocking the locked file or folder click the View icon of the selected file. It opens the Editing Permission menu, then click on the Publish option to unlock the file.
View Unlocked File
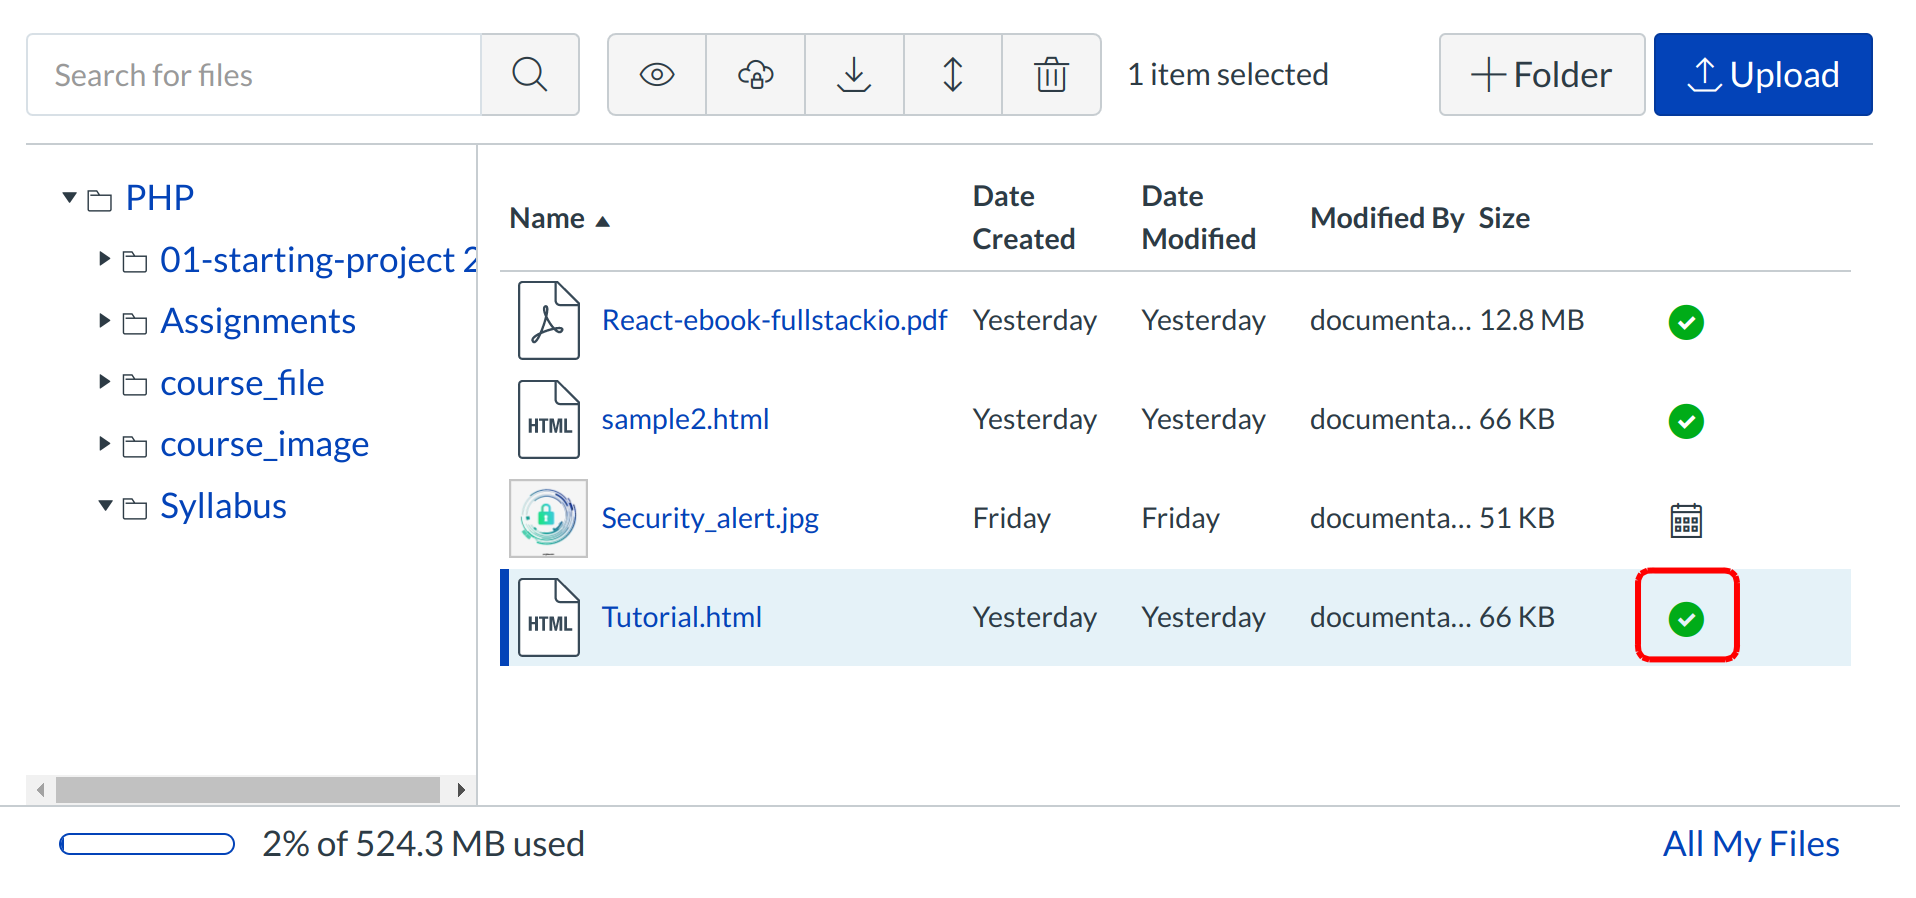
When the file is unlocked the View icon present in the selected file is turns to tick mark icon